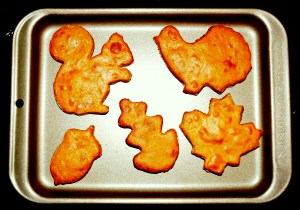
Cello has had recurring ear infections lately. It was suggested to us to try her on a grain-free diet for 30 days to see if her ear problem ceases. Her dog food is of very high quality, and is already grain free. However, all of the treats I was making her had whole-wheat flour as an ingredient …so – this is the first grain-free treat to be made in Cello’s Cucina!
We are going to go camping for Thanksgiving, so I decided to make these treats to bring on the trip for Cello… I chose Fall cookie cutters…a turkey, 2 different shaped leaves, an acorn, and a Squirrel (Cello’s favorite!)
Fall cookie cutters
Cello is licking her lips waiting for her treats to be done! 
INGREDIENTS:
- 2 1/2 to 3 c. of organic garbanzo bean flour (SEE NOTE)
- 2 1/2 Tbsp of creamy organic peanut butter (unsweetened and no salt)
- Be sure that the peanut butter you use doesn’t contain xylitol)
- 2 Tbsp pure natural organic honey
- 3/4 c. organic canned pumpkin (PURE pumpkin – NOT pumpkin pie filling)
DIRECTIONS:
1. preheat oven to 300 degrees F
2. In a medium bowl, mix all ingredients until completely combined
3. The dough will be very sticky – so generously flour everything – including your hands. Roll the dough out to about 1/4-inch thickness.
Use cookie cutters of your choice to cut out the cookies.
4. Place cookies on a parchment paper-lined cookie tray, and bake the cookies for 30 minutes, or until golden brown. The cookies will
come out a pretty pumpkiny-brown! Let cool on a wire rack for soft treats, or turn oven off and let treats sit in oven for 1-2 hours or more if you want crunchier treats. I baked mine at night, so I just shut the oven off and left treats to cool overnight. In the morning I put some in the refrigerator, and some in the freezer to take on our camping trip.
Cookies can be stored in an air tight container in refrigerator for approximately 2 weeks – or in the freezer if you would like them to last a bit longer, or if you wanted to save them for a later date.
NOTE: have lots of extra garbanzo bean flour – the dough is REALLY sticky…so you will need to add flour to the dough, the cookie cutters, the roller, and the work surface (I used a glass cutting board – which worked the best with this sticky dough)


